In this series, “Learn FileMaker Like A Boss“, we’re exploring those techniques, mindsets, and tools that make us a better developer. I’m starting the series with topics based on my own discoveries during my formative FileMaker years. In this post, we will take a look at the FileMaker Script Debugger.
The FileMaker Script Debugger (found in the Tools menu of FileMaker Pro Advanced ) is a developer’s essential tool for testing a script to see if it works as described in the use case. We can watch a script step-by-step as it runs. We can control it precisely, running through the whole script or just parts of it as we test it out.
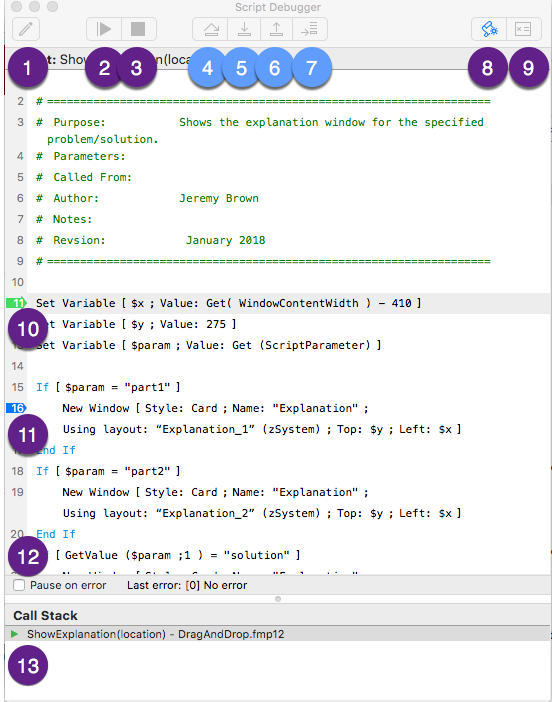
The many buttons and parts to this debugger are shown in the picture, and FileMaker’s help has a complete description of each.
Narrow Our View
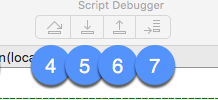
What we are going to do is focus on using the buttons labeled as 4, 5, 6, and 7. Though FileMaker’s help talks about these, I’m going to put it into practical terms how these can be used. So as I go thru this description, refer back to this diagram.
All You Can Do
We can:
- Perform each step in sequence
- Perform many steps at once
- Perform an entire subscript without having to view that script’s steps
- Skip over a certain part of the script
- Back up
Let’s discuss each one of these in detail. The video that accompanies this post will show this clearly as well.
Perform each step in sequence
Button 5, called “Step into” performs each executable step in sequence. Clicking that button (or its shortcut F6) performs the step the Active indicator is on ( label 10) and pauses at the next step. If this button is clicked on a subscript, that script’s steps will display in the debugger and the active indicator will be at the first executable step in this subscript. This button is very handy to watch every step in every script being called. I tend to use this one more.
Perform many steps at once
Button 6, called “Step Out” simply performs all the steps in the current script until it reaches a breakpoint (label 11) or the end of the script. This could be in the parent script or in a subscript. If in a subscript and there are no breakpoints, the action will return to the next line of the parent script
Perform an entire subscript without having to view the steps
Button 4 is one I fail to use often, but am using it more. “Step Over” does roughly the same as button 5: it performs each script step in sequence, and it performs an entire subscript up to a break-point. Clicking this button, we will not see the subscript’s steps, up until a break-point in the subscript.
Skip over a certain part of the script or Back up
This action and the next one are done by the same button, button 7, called “Set Next Step”. This is an amazing command that I always forget about. A former colleague, Agnes Riley, reminded me of it. This button allows you to pick the next step to be performed. You highlight the step you wish to go to and press this button. The active indicator will go that step but will not perform it.
How it is used
- Go back to the beginning of the script.
- Skip an entire section of the script
- Go into some logic that is not true in the normal course of the script.
This action requires some thought and care. In FileMaker, context is king, so a script step needs the right context to be able to perform the expected action. And it might not make sense to skip an entire part of the script, but if it can be done safely, then this button helps with that. But this is extremely useful to test and retest a part of the script. I’m finding this more and more useful.
The Script Debugger In the Real World

Real-life Uses
Backup and Start Over
I start to test this script, and so I press button 5, “Step Into” from the Script Workspace. I notice that the debugger isn’t going into any of the If statements, and realize it is because I forgot to run this from the button which passes in the parameter. Rather than stopping the script, I can add the $param variable in the data viewer (see next post), setting the value to “part1” and then go back to line 11. I highlight that line and then press “Set Next Step” (button 7). This takes the active indicator back to line 11 and allows me to run through and finish the script.
Go inside
Next, I finish testing the logic inside the IF statement at line 15. I get to line 27 and, before I stop this script, I test line 19. Even though $param = “part1” I can use the “Set Next Step” button to go inside the lF statement at line 18. So I highlight line 19 and press “Set Next Step”.
Skip a Subscript
Again I run the script , debugging it from the button with the “Solution” parameter so that line 21 will be true. It opens the card window on line 22. I next press “Step Over” (button 4) and the subscript is fully performed. That is useful because I don’t need to test that subscript.
Test A Subscript
I decide to test the subscript on line 23. I debug the script with the “solution” as the parameter and then, on line 23, press “Step Into”. This opens up the subscript in the debugger (I can see the names of the two scripts in the call stack, label 13). I view this subscript and decide it doesn’t need to be stepped thru line by line, so I press “Step Out” (button 6). This fully-performs this subscript and takes me back to the parent script.


Trackbacks/Pingbacks